- Introduction
- Setting up the project
- Introduction to nix
- Developing the flake
- NixOS integration
- Conclusion
Introduction
This is going to be a short guide to building and deploying a full-stack project composed of a Rust backend and an HTML/Javascript front-end that uses Nix for integration into a NixOS server.
Nix and NixOS are a collection of tools that aim to produce declarative builds and deployments while ensuring completely reproducible systems. They also provide ways to ensure the same development environment between team members, avoiding annoying dependency management problems.
By the end of this blog, you will have a working packaging and deployment setup using Nix flakes.
Setting up the project
Initialize a rust project
Let’s start by creating a new Rust project using Cargo, which is Rust’s package manager and build tool. Run the following command to create a new binary template project named fullstack.
❯ cargo init fullstack && cd fullstack
We are going to be using Actix as our web framework, so we need to add it to our Cargo dependencies. Open Cargo.toml in your favorite text editor and add the following:
[dependencies]
actix-web = "4"
Following the Getting Started guide provided by actix, let’s add some endpoints to our server. Open src/main.rs and replace it with the following:
use actix_web::{get, post, web, App, HttpResponse, HttpServer, Responder};

#[get("/hello")]
async fn hello() -> impl Responder {
    HttpResponse::Ok().body("Hello world!")
}

#[post("/echo")]
async fn echo(req_body: String) -> impl Responder {
    HttpResponse::Ok().body(req_body)
}

#[actix_web::main]
async fn main() -> std::io::Result<()> {
    HttpServer::new(move || App::new().service(web::scope("/api").service(hello).service(echo)))
        .bind(("127.0.0.1", 8080))?
        .run()
        .await
}
This defines two endpoints, a GET endpoint at /api/hello and a POST endpoint at /api/echo that takes a string body. With this update, we can run our project with cargo run, and it should be available at localhost:8080.
❯ curl localhost:8080/api/hello
Hello world!

❯ curl localhost:8080/api/echo -d 'Hello POST!'
Hello POST!
Add a front-end
Let’s add a front-end for our app. Create a new file at static/index.html in our project directory and add the following code:
<!doctype html>
<html lang="en">
  <head>
    <meta charset="UTF-8" />
    <meta name="viewport" content="width=device-width, initial-scale=1.0" />
    <title>Rust Fullstack Example</title>
    <link
      rel="stylesheet"
      href="https://cdn.jsdelivr.net/npm/@picocss/pico@2/css/pico.zinc.min.css"
    />
  </head>
  <body>
    <main class="container">
      <h1>Rust Fullstack Example</h1>

      <section>
        <h2>Call /api/hello</h2>
        <button id="helloButton">Say Hello</button>
        <button id="clearHelloResponse">Clear Response</button>
        <p id="helloResponse"></p>
      </section>

      <section>
        <h2>Call /api/echo</h2>
        <form id="echoForm">
          <input
            type="text"
            id="echoInput"
            placeholder="Enter text to echo"
            required
          />
          <button type="submit">Echo</button>
          <button type="button" id="clearEchoResponse">Clear Response</button>
        </form>
        <p id="echoResponse"></p>
      </section>
    </main>

    <script>
      document
        .getElementById("helloButton")
        .addEventListener("click", async () => {
          const response = await fetch("/api/hello");
          const text = await response.text();
          document.getElementById("helloResponse").innerText = text;
        });

      document
        .getElementById("echoForm")
        .addEventListener("submit", async (event) => {
          event.preventDefault();
          const input = document.getElementById("echoInput").value;
          const response = await fetch("/api/echo", {
            method: "POST",
            headers: {
              "Content-Type": "text/plain",
            },
            body: input,
          });
          const text = await response.text();
          document.getElementById("echoResponse").innerText = text;
        });

      document
        .getElementById("clearHelloResponse")
        .addEventListener("click", () => {
          document.getElementById("helloResponse").innerText = "";
        });

      document
        .getElementById("clearEchoResponse")
        .addEventListener("click", () => {
          document.getElementById("echoResponse").innerText = "";
        });
    </script>
  </body>
</html>
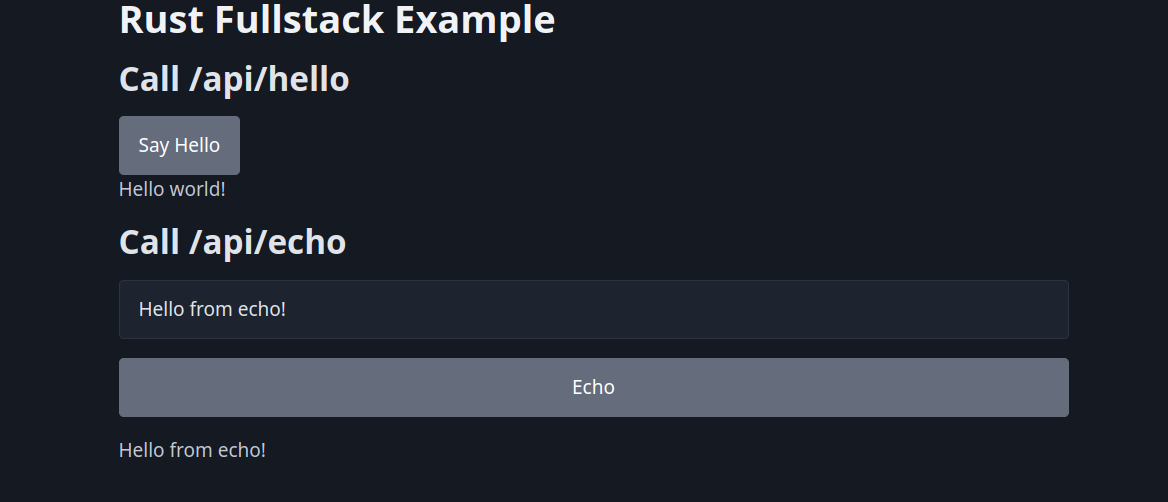
Now we have a button that calls our /api/hello endpoint and displays the response and a form that calls our /api/echo endpoint passing in the text input and displaying the response. We do this by adding event listeners to the elements and using fetch to send GET and POST requests to our endpoints.
This is great, but we currently do not have a way to serve our index.html file to the browser. To do this, let’s add the actix_files crate to our Cargo dependencies. Open our Cargo.toml file and add the following:
[dependencies]
actix-web = "4"
actix-files = "0.6"
Then, we need to change our src/main.rs file to serve the static/index.html file like so:
use actix_web::{get, post, web, App, HttpResponse, HttpServer, Responder};
use std::{env, path::PathBuf};

#[get("/hello")]
async fn hello() -> impl Responder {
    HttpResponse::Ok().body("Hello world!")
}

#[post("/echo")]
async fn echo(req_body: String) -> impl Responder {
    HttpResponse::Ok().body(req_body)
}

#[actix_web::main]
async fn main() -> std::io::Result<()> {
    let mut static_dir = env::current_exe()
        .ok()
        .and_then(|pb| pb.parent().map(PathBuf::from))
        .unwrap_or_else(|| PathBuf::from("."))
        .join("static");
    if cfg!(debug_assertions) {
        static_dir = "./static".into();
    }

    HttpServer::new(move || {
        App::new()
            .service(web::scope("/api").service(hello).service(echo))
            .service(actix_files::Files::new("/", static_dir.clone()).index_file("index.html"))
            .default_service(web::route().to(HttpResponse::NotFound))
    })
    .bind(("127.0.0.1", 8080))?
    .run()
    .await
}
If we now browse to http://localhost:8080 with our browser, we should now see our full-stack app in action.
Introduction to nix
Installing nix
If you are running a non-NixOS Linux distribution, you will need to install Nix. This can be confusing because “Nix” can refer to three different things:
- Nix the package manager: A tool for managing packages.
- Nix the programming language: A Turing-complete functional programming language used to write Nix packages and NixOS modules.
- NixOS: A Linux distribution that utilizes the Nix package manager and NixOS modules to define and configure the operating system in a reproducible manner.
If you are interested in learning Nix or using NixOS, nix.dev is a great resource.
The one we care about currently, is Nix the package manager. To install it run the following command taken from the official download instructions:
❯ sh <(curl -L https://nixos.org/nix/install) --daemon
Introduction to nix flakes
Nix flakes are an experimental feature of the Nix package manager that enhance Nix expressions by offering a standardized way to write them, along with dependency version pinning managed through the flake.lock file. To enable them, we need to append the following to ~/.config/nix/nix.conf or /etc/nix/nix.conf.1
experimental-features = nix-command flakes
Below is an example of the basic structure of a flake.nix file used to define a NixOS configuration:
{
  inputs.nixpkgs.url = github:NixOS/nixpkgs/nixos-unstable;

  outputs = { self, nixpkgs }: {
    nixosConfigurations.hostname = nixpkgs.lib.nixosSystem {
      system = "x86_64-linux";
      modules = [ ./configuration.nix ];
    };
  };
}
As you can see, a flake.nix file is a Nix expression that has a special structure.
It has 4 top-level attributes:1
descriptionis a string describing the flake.inputsis an attribute set of all the dependencies of the flake.outputsis a function of one argument that takes an attribute set of all the realized inputs, and outputs another attribute set.nixConfigis an attribute set of values, which reflect the values given tonix.conf. This can extend the normal behavior of a user’s nix experience by adding flake-specific configuration, such as a binary cache.
The main ones we care about are inputs and outputs.
Developing the flake
Let’s create a flake.nix file in the root of our project.
Define inputs
Below we define the inputs that our flake receives. First, we get the nixpkgs repository, which is the community maintained list of packages for Nix. Second, we get crane, which is a nix library for building rust cargo projects. Note that we specify that the nixpkgs version that crane uses should follow our nixpkgs version. Finally, we get flake-utils, another library that makes writing flakes a little easier.
{
  inputs = {
    nixpkgs.url = "github:NixOS/nixpkgs/nixpkgs-unstable";
    crane = {
      url = "github:ipetkov/crane";
      inputs.nixpkgs.follows = "nixpkgs";
    };
    flake-utils.url = "github:numtide/flake-utils";
  };

  outputs = {
    self,
    ...
  }:
}
Define outputs
Moving on to the outputs: described earlier, this function takes the aforementioned inputs and returns a new attribute set. We use the eachDefaultSystem function from the flake-utils library that iterates over each default system and evaluates the provided function. In its body, we start by defining some variables, pkgs and craneLib. Then, we define the htmlOrCargo variable, which we then pass to lib.cleanSourceWith to tell crane which files from our project to ignore. Think of this as a sort of .gitignore mechanism but for our nix package.
  outputs = {
    self,
    nixpkgs,
    crane,
    flake-utils,
    ...
  }:
    flake-utils.lib.eachDefaultSystem (system: let
      pkgs = nixpkgs.legacyPackages.${system};
      craneLib = crane.mkLib pkgs;

      inherit (pkgs) lib;

      htmlFilter = path: _type: null != builtins.match ".*html$" path;
      htmlOrCargo = path: type: (htmlFilter path type) || (craneLib.filterCargoSources path type);
      src = lib.cleanSourceWith {
        src = craneLib.path ./.;
        filter = htmlOrCargo;
      };
    in {
    });
Defining our package
Finally, we create our package definition, passing in the src we defined earlier, its name and a postInstall script to run after the build has completed.
      fullstack = craneLib.buildPackage {
        inherit src;
        name = "fullstack";
        postInstall = ''
          cp -r static $out/bin
        '';
      };
Let’s examine the flake.nix in its entirety. As you can see, after the let expression, we define the output of our flake to be two packages, the default package and the full-stack package.
{
  inputs = {
    nixpkgs.url = "github:NixOS/nixpkgs/nixpkgs-unstable";
    crane = {
      url = "github:ipetkov/crane";
      inputs.nixpkgs.follows = "nixpkgs";
    };
    flake-utils.url = "github:numtide/flake-utils";
  };

  outputs = {
    self,
    nixpkgs,
    crane,
    flake-utils,
    ...
  }:
    flake-utils.lib.eachDefaultSystem (system: let
      pkgs = nixpkgs.legacyPackages.${system};
      craneLib = crane.mkLib pkgs;

      inherit (pkgs) lib;

      htmlFilter = path: _type: null != builtins.match ".*html$" path;
      htmlOrCargo = path: type: (htmlFilter path type) || (craneLib.filterCargoSources path type);
      src = lib.cleanSourceWith {
        src = craneLib.path ./.;
        filter = htmlOrCargo;
      };

      fullstack = craneLib.buildPackage {
        inherit src;
        name = "fullstack";
        postInstall = ''
          cp -r static $out/bin
        '';
      };
    in {
      packages.default = fullstack;
      packages.fullstack = fullstack;
    });
}
In the postInstall script we specify that along with the fullstack binary, we should also copy the static directory to the output folder. Let’s build our package and see the result.
❯ nix build
❯ eza result/ --tree
result
└── bin
   ├── fullstack
   └── static
      └── index.html
Great, we now have a working nix package for our full-stack app. We can use this to vendor it, or integrate it into an existing NixOS configuration for deployment.
Development shell environment
To ensure a consistent developer environment, let’s also define a development shell in our flake with some core packages that are required to work on the project.
Below, we define a devShell with the nil package, a language server for the nix programming language so that we get nice autocompletion and error reporting when working on our flake.
    ...
    packages.default = fullstack;
    packages.fullstack = fullstack;

    devShells.default = pkgs.mkShell {
      packages = [
        pkgs.nil
      ];
    };
Running ❯ nix develop now puts us into a new shell environment where the nil binary is available, without having to install and manage it system-wide.
NixOS integration
Let’s look at an example of how we could add our fullstack package to a NixOS configuration.
We start by adding an input to the flake.nix of our NixOS configuration by providing a URL to the flake.
    fullstack = {
      url = "github:user/fullstack";
      inputs.nixpkgs.follows = "nixpkgs";
    };
Then, we create a nix module that we can import in the target system’s configuration.
{
  config,
  pkgs,
  inputs,
  ...
}: let
  pkg = inputs.fullstack.packages.${pkgs.system}.default;
  port = 8080;
  port_str = builtins.toString port;
in {
  services.nginx.virtualHosts."fullstack.example.com" = {
    forceSSL = true;
    locations."/" = {
      proxyPass = "http://localhost:${port_str}";
      extraConfig = ''
        proxy_ssl_server_name on;
        proxy_pass_header Authorization;
      '';
    };
  };

  systemd.services.fullstack = {
    wantedBy = ["multi-user.target"];
    after = ["network.target"];
    script = "${pkg}/bin/fullstack";
    serviceConfig = {
      Restart = "always";
    };
  };
}
The nix module gets our fullstack package from the inputs and declares some helper variables. It then defines a systemd service that runs our fullstack app and a nginx virtual host that points to the URL that our app runs at. Now, anytime we want to deploy our app, we only need to update the flake inputs for our NixOS configuration and issue a NixOS rebuild. This can also be done automatically through CI/CD pipelines like GitHub Actions, but that is a topic for another time.
Conclusion
By following this guide, you should have a better idea of how to deploy a full-stack application that uses Rust, HTML/JavaScript, and Nix flakes on a NixOS server. You can apply these principles regardless of the programming language you use, so feel free to adapt them to your preferred tech stack. Happy coding!
Flake Resources: nixos.wiki nix.dev nixos-and-flakes